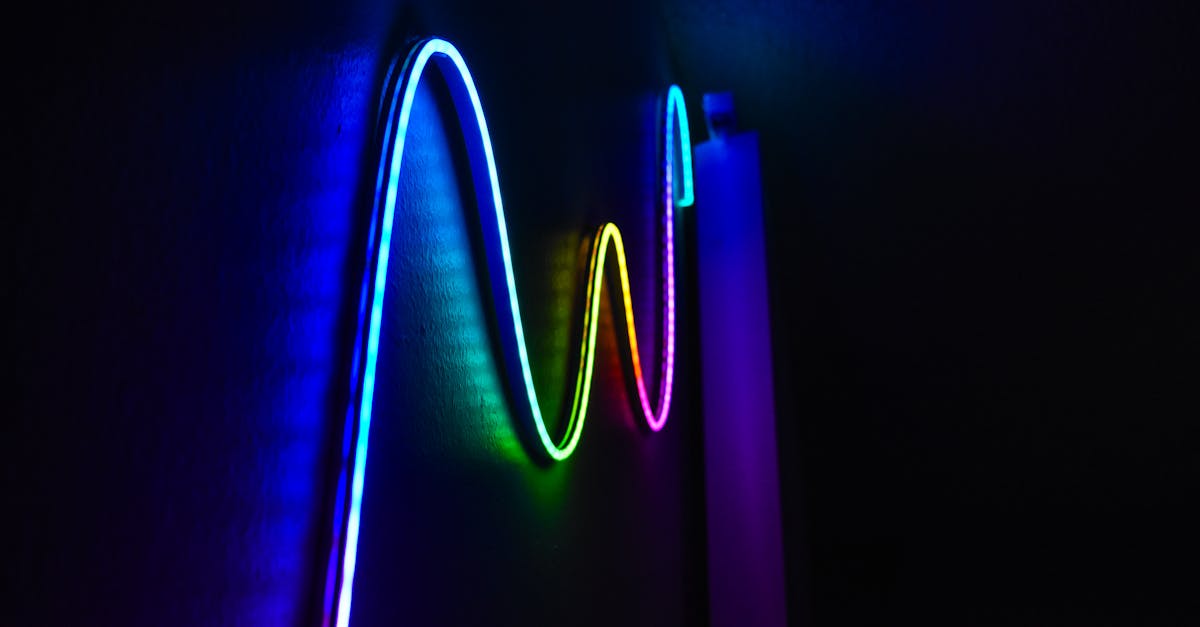
If you have ever watched a desk setup video with flowing rainbow lights behind a monitor, or seen a DIY music visualizer pulsing to the beat, chances are you were looking at WS2812B addressable LED strips. These tiny, programmable LEDs have become the backbone of maker lighting projects worldwide, and for good reason: they are cheap, powerful, and absurdly fun to program.
This guide covers everything from first principles to advanced animation code. Whether you are wiring your first strip to an Arduino Nano or building an ESP32-powered web-controlled light installation, you will find what you need here.
Addressable LEDs vs Regular LED Strips
A standard 12V LED strip is simple. Apply power and the entire strip lights up in one color. You can dim it, but every LED on the strip does the same thing at the same time.
Addressable LED strips are fundamentally different. Each LED contains a tiny integrated circuit (IC) that receives digital commands. You can set LED number 0 to red, LED number 1 to blue, and LED number 2 to green, all independently and simultaneously. This is what makes animations, gradients, and reactive effects possible.
The WS2812B is the most popular addressable LED IC. Each WS2812B package combines a red, green, and blue LED die with a control chip in a single 5050-size SMD package (5mm x 5mm). Data flows in on one pin and out on another, allowing you to daisy-chain hundreds of LEDs on a single data wire.
WS2812B Technical Specifications
| Parameter | Value |
|---|---|
| Operating Voltage | 5V DC |
| Current per LED | ~60mA at full white (20mA per channel) |
| Color Depth | 24-bit (8 bits per channel, 16.7 million colors) |
| Data Protocol | Single-wire, 800 kHz NRZ |
| Data Pin | 1 (DIN for input, DOUT for output) |
| Color Order | GRB (not RGB — this trips up many beginners) |
| Package | 5050 SMD (5mm x 5mm) |
| Max Refresh Rate | ~400 Hz for 60 LEDs, decreases with count |
The protocol is time-critical: a logic "1" is a long high pulse followed by a short low pulse, and a logic "0" is the reverse. Each LED reads the first 24 bits of data it receives, then passes the rest downstream. A reset signal (low for >50 microseconds) tells all LEDs to latch their new values. You never need to implement this yourself — libraries handle it — but understanding the protocol helps when debugging.
Available Form Factors
WS2812B LEDs come in more than just strips:
| Form Factor | Common Densities | Best For |
|---|---|---|
| LED Strips | 30, 60, or 144 LEDs per metre | Ambient lighting, desk setups, backlighting |
| LED Rings | 8, 12, 16, 24, 60 LEDs | Clocks, gauges, status indicators |
| LED Matrices | 8x8, 16x16, 8x32 | Text displays, pixel art, small screens |
| Individual Modules | Single LED on breakout PCB | Prototyping, indicators |
30 LEDs/m strips have visible gaps between LEDs and work well for indirect lighting. 60 LEDs/m is the sweet spot for most projects — dense enough for smooth animations, affordable, and easy to power. 144 LEDs/m produces a nearly seamless line of light but draws serious current and costs more.
Power Calculations
This is where most projects fail. WS2812B LEDs are power-hungry, and underestimating your supply will cause flickering, color distortion, or worse.
The math is simple:
Each LED draws up to 60mA at full white (all three channels at 255). For a 60-LED strip:
60 LEDs x 60mA = 3,600mA = 3.6A at full brightness white
For a 144-LED strip (1 metre at 144/m):
144 LEDs x 60mA = 8,640mA = 8.64A
In practice, you rarely run all LEDs at full white simultaneously. Animations and colored patterns typically draw 30-50% of maximum. A reasonable rule of thumb: plan for 40mA per LED for typical use, but ensure your supply can handle the theoretical maximum.
| Strip Length | LED Count (60/m) | Max Current | Recommended PSU |
|---|---|---|---|
| 0.5m | 30 | 1.8A | 5V 3A |
| 1m | 60 | 3.6A | 5V 5A |
| 2m | 120 | 7.2A | 5V 10A |
| 5m | 300 | 18A | 5V 20A (or multiple supplies) |
Always use a 5V regulated power supply rated for your maximum draw plus 20% headroom. For anything over 2 metres, you need power injection (more on that below).
Wiring Guide
Basic Wiring (Up to 30-60 LEDs)
The minimal circuit requires three connections:
- 5V from your power supply to the strip's 5V pad
- GND from the power supply to the strip's GND pad (and to your microcontroller's GND)
- Data from a microcontroller GPIO pin to the strip's DIN pad
Two critical additions you should never skip:
- A 300-500 ohm resistor on the data line, placed as close to the first LED's DIN pin as possible. This dampens signal reflections and prevents the first LED from latching garbage data.
- A 1000 microfarad electrolytic capacitor across the power supply terminals (positive to 5V, negative to GND). This absorbs the initial inrush current when you power on the strip and protects the LEDs from voltage spikes.
                    300-500 ohm
Arduino Pin 6 ----[===]---- DIN
                              |
5V PSU (+) -----+------------ 5V Strip
                |
           [1000uF Cap]
                |
5V PSU (-) -----+------------ GND Strip --- Arduino GND
Power Injection for Long Strips
For strips longer than 1 metre (60+ LEDs), voltage drop across the thin copper traces becomes a real problem. LEDs at the far end receive less than 5V, causing them to appear dimmer and shift toward red/yellow.
The solution: inject power at multiple points. Run additional 5V and GND wires from your power supply to the midpoint and far end of the strip. For a 5-metre strip, inject power at least every metre.
Wire gauge matters. For 5A of current, use at least 18 AWG wire. For 10A+, use 16 AWG or thicker. Thin jumper wires will overheat.
Level Shifting: ESP32 to WS2812B
Here is a critical gotcha: the ESP32 runs at 3.3V logic while WS2812B LEDs expect 5V data signals. The WS2812B datasheet specifies a minimum high-level input voltage of 3.5V (0.7 x VDD). At 3.3V, you are below spec, and while it often works with short wires, it becomes unreliable with longer runs or in noisy environments.
Solutions, from simplest to best:
-
74HCT245 level shifter (recommended) — A dedicated logic level shifter IC. Connect the WS2812B data line through one channel. Powered at 5V, it accepts 3.3V inputs and outputs clean 5V signals. This is the professional solution.
-
Simple MOSFET level shifter — A BSS138 N-channel MOSFET with pull-up resistors. Works well and costs almost nothing.
-
Sacrificial LED method — Wire the first WS2812B LED from 3.3V instead of 5V. Its DOUT will be at 3.3V levels, which the second LED (powered at 5V) sees as a valid signal. You lose one LED but avoid extra components.
For Arduino Uno and Nano users running at 5V logic: you do not need a level shifter. Your data pin already outputs 5V.
FastLED vs Adafruit NeoPixel
Two libraries dominate WS2812B programming. Here is how they compare:
| Feature | FastLED | Adafruit NeoPixel |
|---|---|---|
| Color Model | HSV and RGB natively | RGB only (HSV via manual conversion) |
| Performance | Faster, uses hardware SPI when available | Slightly slower |
| LED Types Supported | WS2812B, APA102, SK6812, WS2811, and 50+ more | WS2812B, SK6812, and a few others |
| Built-in Effects | Color palettes, blending, noise, math functions | Minimal — you build everything yourself |
| Memory Usage | 3 bytes per LED | 3 bytes per LED |
| Ease of Use | Moderate — more to learn, more power | Simple — minimal API |
| Best For | Animations, complex projects, advanced users | Simple projects, beginners, reliability |
Our recommendation: Start with FastLED for any project beyond static colors. Its HSV color model, palette system, and math helpers make animation code dramatically simpler.
Code Examples
All examples below use FastLED with an Arduino or ESP32. Adjust DATA_PIN and NUM_LEDS for your setup.
Basic Setup and Solid Color
#include <FastLED.h>

#define NUM_LEDS 60
#define DATA_PIN 6

CRGB leds[NUM_LEDS];

void setup() {
  FastLED.addLeds<WS2812B, DATA_PIN, GRB>(leds, NUM_LEDS);
  FastLED.setBrightness(128); // 0-255, keep it reasonable

  // Set all LEDs to a warm orange
  fill_solid(leds, NUM_LEDS, CRGB(255, 100, 0));
  FastLED.show();
}

void loop() {
  // Nothing to do — static color
}
Note the GRB color order. If your reds and greens are swapped, this is why.
Rainbow Effect
A smooth, flowing rainbow that cycles through all hues:
#include <FastLED.h>

#define NUM_LEDS 60
#define DATA_PIN 6

CRGB leds[NUM_LEDS];
uint8_t hue = 0;

void setup() {
  FastLED.addLeds<WS2812B, DATA_PIN, GRB>(leds, NUM_LEDS);
  FastLED.setBrightness(120);
}

void loop() {
  // fill_rainbow distributes hues evenly across the strip
  fill_rainbow(leds, NUM_LEDS, hue, 7);
  FastLED.show();
  hue++; // Slowly rotate the starting hue
  delay(20);
}
The third argument to fill_rainbow is the starting hue, and the fourth is the hue delta between adjacent LEDs. Increase it for a tighter rainbow, decrease it for broader color bands.
Theater Chase / Running Lights
A classic "marquee" effect where groups of LEDs appear to chase along the strip:
#include <FastLED.h>

#define NUM_LEDS 60
#define DATA_PIN 6

CRGB leds[NUM_LEDS];

void setup() {
  FastLED.addLeds<WS2812B, DATA_PIN, GRB>(leds, NUM_LEDS);
  FastLED.setBrightness(150);
}

void loop() {
  theaterChase(CRGB::Red, 80);
  theaterChase(CRGB::Green, 80);
  theaterChase(CRGB::Blue, 80);
  theaterChase(CRGB::White, 80);
}

void theaterChase(CRGB color, int wait) {
  for (int cycle = 0; cycle < 10; cycle++) {
    for (int offset = 0; offset < 3; offset++) {
      fill_solid(leds, NUM_LEDS, CRGB::Black);
      for (int i = offset; i < NUM_LEDS; i += 3) {
        leds[i] = color;
      }
      FastLED.show();
      delay(wait);
    }
  }
}
Fire Simulation Effect
This is a visually stunning effect that simulates flickering flames. It uses FastLED's heat palette:
#include <FastLED.h>

#define NUM_LEDS 60
#define DATA_PIN 6

CRGB leds[NUM_LEDS];
byte heat[NUM_LEDS];

// Tuning parameters
#define COOLING  55   // How quickly the flame cools (20-100)
#define SPARKING 120  // Chance of new sparks (50-200)

void setup() {
  FastLED.addLeds<WS2812B, DATA_PIN, GRB>(leds, NUM_LEDS);
  FastLED.setBrightness(180);
}

void loop() {
  fireEffect();
  FastLED.show();
  delay(15);
}

void fireEffect() {
  // Step 1: Cool down every cell slightly
  for (int i = 0; i < NUM_LEDS; i++) {
    heat[i] = qsub8(heat[i], random8(0, ((COOLING * 10) / NUM_LEDS) + 2));
  }

  // Step 2: Heat drifts upward and diffuses
  for (int k = NUM_LEDS - 1; k >= 2; k--) {
    heat[k] = (heat[k - 1] + heat[k - 2] + heat[k - 2]) / 3;
  }

  // Step 3: Randomly ignite new sparks near the bottom
  if (random8() < SPARKING) {
    int y = random8(7);
    heat[y] = qadd8(heat[y], random8(160, 255));
  }

  // Step 4: Map heat to LED colors using the HeatColors palette
  for (int j = 0; j < NUM_LEDS; j++) {
    leds[j] = HeatColor(heat[j]);
  }
}
Mount the strip vertically with LED 0 at the bottom for the most realistic flame direction.
Color Palette Animation
FastLED's palette system lets you define 16-color gradients and smoothly interpolate across them. This is incredibly powerful for creating mood lighting:
#include <FastLED.h>

#define NUM_LEDS 60
#define DATA_PIN 6

CRGB leds[NUM_LEDS];
uint8_t startIndex = 0;

// Define a custom palette: ocean theme
DEFINE_GRADIENT_PALETTE(ocean_gp) {
    0,   0,   0,  64,   // Deep blue
   64,   0,  64, 128,   // Medium blue
  128,   0, 128, 255,   // Bright blue
  192,   0, 255, 200,   // Cyan
  255,   0,  64, 128    // Back to medium blue
};

CRGBPalette16 currentPalette = ocean_gp;

void setup() {
  FastLED.addLeds<WS2812B, DATA_PIN, GRB>(leds, NUM_LEDS);
  FastLED.setBrightness(120);
}

void loop() {
  startIndex++;

  for (int i = 0; i < NUM_LEDS; i++) {
    // ColorFromPalette interpolates smoothly between palette entries
    leds[i] = ColorFromPalette(currentPalette, startIndex + (i * 4), 255, LINEARBLEND);
  }

  FastLED.show();
  delay(20);
}
You can swap ocean_gp for FastLED's built-in palettes like RainbowColors_p, PartyColors_p, ForestColors_p, LavaColors_p, or CloudColors_p.
Sound-Reactive LEDs (Analog Microphone Module)
Connect an analog sound sensor module (like the KY-038 or MAX4466) to an analog input. The LEDs will pulse with ambient sound:
#include <FastLED.h>

#define NUM_LEDS 60
#define DATA_PIN 6
#define MIC_PIN A0

CRGB leds[NUM_LEDS];

// Smoothing
int sampleWindow = 50; // Sample window in milliseconds
uint8_t peakHue = 0;

void setup() {
  FastLED.addLeds<WS2812B, DATA_PIN, GRB>(leds, NUM_LEDS);
  FastLED.setBrightness(200);
  pinMode(MIC_PIN, INPUT);
}

void loop() {
  // Sample the microphone over a window to find peak-to-peak amplitude
  unsigned long startMillis = millis();
  int signalMax = 0;
  int signalMin = 1024;

  while (millis() - startMillis < sampleWindow) {
    int sample = analogRead(MIC_PIN);
    if (sample > signalMax) signalMax = sample;
    if (sample < signalMin) signalMin = sample;
  }

  int amplitude = signalMax - signalMin; // 0-1023 range
  int numLit = map(amplitude, 0, 500, 0, NUM_LEDS);
  numLit = constrain(numLit, 0, NUM_LEDS);

  // Shift hue slowly for variety
  peakHue++;

  // Fill from center outward
  fill_solid(leds, NUM_LEDS, CRGB::Black);
  int center = NUM_LEDS / 2;

  for (int i = 0; i < numLit / 2; i++) {
    CRGB color = CHSV(peakHue + (i * 4), 255, 255);
    if (center + i < NUM_LEDS) leds[center + i] = color;
    if (center - i >= 0) leds[center - i] = color;
  }

  FastLED.show();
}
Tip: Adjust the map() range (the 500 value) based on your microphone module's sensitivity. Start by printing raw values to the serial monitor and calibrating from there.
Web-Controlled Colors via ESP32 WiFi
This example runs a simple web server on the ESP32. Open the IP address in a browser, pick a color, and the strip updates in real time:
#include <FastLED.h>
#include <WiFi.h>
#include <WebServer.h>

#define NUM_LEDS 60
#define DATA_PIN 5  // GPIO5 on ESP32

CRGB leds[NUM_LEDS];
WebServer server(80);

const char* ssid = "YOUR_WIFI_SSID";
const char* password = "YOUR_WIFI_PASSWORD";

// Current state
uint8_t r = 255, g = 100, b = 0;

const char webpage[] PROGMEM = R"rawliteral(
<!DOCTYPE html>
<html>
<head>
  <meta name="viewport" content="width=device-width, initial-scale=1">
  <title>LED Control</title>
  <style>
    body { font-family: sans-serif; text-align: center; padding: 20px; background: #111; color: #eee; }
    input[type=color] { width: 150px; height: 150px; border: none; cursor: pointer; border-radius: 12px; }
    .btn { padding: 12px 32px; font-size: 18px; border: none; border-radius: 8px; cursor: pointer; margin: 8px; }
    .on { background: #FF6B35; color: white; }
    .off { background: #333; color: #ccc; }
  </style>
</head>
<body>
  <h1>WS2812B Controller</h1>
  <input type="color" id="picker" value="#ff6400"
    onchange="fetch('/color?hex='+this.value.substring(1))">
  <br><br>
  <button class="btn on" onclick="fetch('/on')">ON</button>
  <button class="btn off" onclick="fetch('/off')">OFF</button>
</body>
</html>
)rawliteral";

void handleRoot() {
  server.send(200, "text/html", webpage);
}

void handleColor() {
  String hex = server.arg("hex");
  long number = strtol(hex.c_str(), NULL, 16);
  r = (number >> 16) & 0xFF;
  g = (number >> 8) & 0xFF;
  b = number & 0xFF;
  fill_solid(leds, NUM_LEDS, CRGB(r, g, b));
  FastLED.show();
  server.send(200, "text/plain", "OK");
}

void handleOn() {
  fill_solid(leds, NUM_LEDS, CRGB(r, g, b));
  FastLED.show();
  server.send(200, "text/plain", "OK");
}

void handleOff() {
  fill_solid(leds, NUM_LEDS, CRGB::Black);
  FastLED.show();
  server.send(200, "text/plain", "OK");
}

void setup() {
  FastLED.addLeds<WS2812B, DATA_PIN, GRB>(leds, NUM_LEDS);
  FastLED.setBrightness(150);

  WiFi.begin(ssid, password);
  Serial.begin(115200);
  while (WiFi.status() != WL_CONNECTED) {
    delay(500);
    Serial.print(".");
  }
  Serial.println(WiFi.localIP());

  server.on("/", handleRoot);
  server.on("/color", handleColor);
  server.on("/on", handleOn);
  server.on("/off", handleOff);
  server.begin();
}

void loop() {
  server.handleClient();
}
Flash this to your ESP32, open the serial monitor to find its IP address, and navigate to it from any device on the same network. The color picker sends requests instantly as you drag across colors.
Power Supply Safety
Working with 5V high-current power supplies demands respect. At 20A, even 5V can melt thin wires and start fires.
Essential safety practices:
- Use a fuse. A 5V 20A supply can deliver enough current to ignite wire insulation before anything trips. Place an inline fuse rated at 125% of your expected maximum draw.
- Use proper wire gauge. 18 AWG for up to 5A, 16 AWG for up to 10A, 14 AWG for up to 15A. Thin dupont jumper wires are for prototyping only.
- Never exceed the supply's rated current. An undersized supply can overheat, drop voltage, or fail unpredictably.
- Keep connections solid. Loose solder joints or alligator clips on high-current connections are a fire risk. Solder your permanent connections or use proper screw terminals.
- Add a power switch. Being able to kill power physically is important during development.
Common Issues and Fixes
First LED flickers or shows random colors: You are missing the data line resistor. Add a 300-470 ohm resistor between the microcontroller pin and the first LED's DIN.
Colors are wrong (red and green swapped):
The WS2812B uses GRB color order, not RGB. In FastLED, specify GRB in your addLeds call. In NeoPixel, use NEO_GRB.
LEDs at the end of the strip are dim or yellowish: Voltage drop. You need power injection — run additional 5V and GND wires from your supply directly to the middle and/or end of the strip.
Strip works fine for a few seconds then goes haywire:
Your power supply cannot handle the load. Either reduce brightness with FastLED.setBrightness() or upgrade your supply.
Nothing happens at all: Check: Is the data wire connected to DIN (not DOUT)? Is GND shared between the microcontroller and the power supply? Are you using the correct GPIO pin number in code?
LEDs work on Arduino but not ESP32: Likely a level shifting issue. The ESP32 outputs 3.3V logic. Add a 74HCT245 level shifter, or try the sacrificial LED method described above.
WS2812B vs SK6812 vs APA102
The WS2812B is not the only addressable LED in town. Here is how it compares to the other popular options:
| Feature | WS2812B | SK6812 (RGBW) | APA102 (DotStar) |
|---|---|---|---|
| Channels | 3 (RGB) | 4 (RGBW) | 3 (RGB) + global brightness |
| White LED | No (mix RGB) | Yes (dedicated) | No |
| Data Lines | 1 (data only) | 1 (data only) | 2 (data + clock) |
| Protocol Speed | 800 kHz | 800 kHz | Up to 24 MHz |
| Refresh Rate | ~400 Hz (60 LEDs) | ~400 Hz (60 LEDs) | ~19 kHz (60 LEDs) |
| Voltage | 5V | 5V | 5V |
| Current (max white) | 60mA | 80mA (RGBW all on) | 60mA |
| Flicker on Camera | Possible at low brightness | Possible at low brightness | None (high refresh) |
| Price | Lowest | ~20% more | ~50-80% more |
| Best For | General projects, budget builds | Warm white mixing, accurate whites | Video production, POV displays, high-speed |
Choose WS2812B for most projects — it is the cheapest, most supported, and perfectly adequate for ambient lighting and animations.
Choose SK6812 RGBW if you need true warm or cool white light. Mixing RGB to create white produces a bluish, inefficient result. The dedicated white LED in SK6812 is brighter and more natural.
Choose APA102 if you need high refresh rates (POV displays, video work) or rock-solid timing. The separate clock line means it is immune to the timing-critical issues that can plague WS2812B on interrupt-heavy platforms.
Project Ideas
Now that you have the knowledge and the code, here are some projects to build:
Ambient Monitor Backlight — Mount a 60 LED/m strip behind your monitor. Use the fire effect for relaxation, rainbow for fun, or the ESP32 web controller to match your mood.
Music Visualizer — Combine the sound-reactive code with a spectrum analysis library (like ArduinoFFT) to create a full frequency-band visualizer. Map bass to one end, treble to the other.
LED Clock — Use a 60-LED ring. Map hours, minutes, and seconds to LED positions with different colors. A single ring becomes a beautiful, minimalist wall clock.
Notification Light — Connect an ESP32 to MQTT or a webhook service. Flash the strip red for urgent emails, pulse blue for chat messages, breathe green when a deploy succeeds.
Staircase Lighting — Mount strips under each step. Use a PIR sensor at the top and bottom to trigger a cascading light-on effect when someone walks up or down.
LED Matrix Display — Wire a 16x16 matrix and use FastLED's XY mapping to display scrolling text, pixel art, or even simple games.
Where to Go from Here
The WS2812B ecosystem is enormous. Once you are comfortable with the basics, explore FastLED's noise functions for organic animations, look into DMX control for stage lighting applications, or dive into WLED — an open-source firmware for ESP32 that gives you hundreds of effects, a phone app, and Home Assistant integration, all without writing a single line of code.
The most important step is the first one: wire up a strip, flash a basic sketch, and watch your first LED light up under your control. Everything after that is just iteration.
Happy building.