If you have tried running smart home devices over WiFi, you already know the frustration. The signal barely reaches your balcony, drops entirely at the garden, and the terrace might as well be another continent. Indian homes -- with their thick concrete walls, multiple floors, and sprawling outdoor areas -- are particularly hostile to WiFi-based automation.
LoRa changes that equation entirely. Short for Long Range, LoRa is a wireless protocol designed to send small packets of data over distances of 2-10 km with minimal power. Pair it with the ESP32 -- a microcontroller with built-in WiFi, plenty of GPIO pins, and a thriving ecosystem -- and you get a home automation backbone that reaches every corner of your property.
In this guide, we will build a complete three-node home automation system from scratch. By the end, you will have a web dashboard on your phone controlling garden watering, monitoring your gate, and automating terrace lights -- all communicating over LoRa.
Why ESP32 + LoRa for Home Automation?
Before we dive into wiring and code, let us understand why this combination works so well for Indian homes.
WiFi limitations in a typical Indian home:
- 2.4 GHz WiFi struggles through RCC (reinforced cement concrete) walls
- Range drops sharply past 10-15 metres indoors, worse outdoors
- Every additional smart device congests the network
- Running Ethernet to the garden or terrace is expensive and impractical
What LoRa brings to the table:
- Penetrates walls and floors with ease at sub-GHz frequencies (868 MHz)
- Range of 1-3 km in urban environments, even more in line-of-sight
- Extremely low power consumption -- remote nodes can run on batteries or small solar panels
- Does not interfere with your home WiFi network
- Simple point-to-point communication, no gateway subscription fees
Why ESP32 specifically:
- Built-in WiFi for the central hub to serve a web dashboard
- Dual-core processor handles LoRa communication and web serving simultaneously
- Deep sleep modes for battery-powered remote nodes (as low as 10 uA)
- Massive community support and Arduino IDE compatibility
- Affordable -- genuine ESP32 DevKits start at around Rs 1,200
System Architecture
Our system follows a hub-and-spoke model:
                    [Your Phone/Laptop]
                          |
                        WiFi
                          |
                  +-----------------+
                  |   CENTRAL HUB   |
                  | ESP32 + Ra-01H  |
                  | (Web Dashboard) |
                  +-----------------+
                    /     |      \
                 LoRa   LoRa   LoRa
                  /       |        \
         +--------+  +--------+  +---------+
         | NODE 1 |  | NODE 2 |  | NODE 3  |
         | Garden |  |  Gate  |  | Terrace |
         +--------+  +--------+  +---------+
         Soil Moist.  Reed SW    DHT22 Temp
         Relay+Pump   Servo Lock Relay+Light
Central Hub sits indoors, connected to your home WiFi. It runs a web server you can access from any device on the network. It communicates with all remote nodes over LoRa.
Remote Nodes are placed wherever you need automation. Each has an ESP32 paired with a LoRa module, plus whatever sensors and actuators the job requires. They send sensor data to the hub and receive commands back.
Hardware List
Here is everything you need. All components are available at wavtron.in.
Central Hub
| Component | Purpose | Approx. Price |
|---|---|---|
| ESP32-C6-DEVKITC-1-N8 | Main controller with WiFi | Rs 1,218 |
| Ra-01H LoRa Module (868 MHz) | Long-range communication | Rs 375 |
| 868 MHz SMA Antenna | LoRa antenna | Rs 120 |
| Breadboard + jumper wires | Prototyping | Rs 150 |
| 5V 2A USB power supply | Powering the hub | Rs 200 |
Node 1 -- Garden Watering
| Component | Purpose | Approx. Price |
|---|---|---|
| ESP32-C3-DEVKITM-1-N4X | Node controller | Rs 1,127 |
| Ra-01H LoRa Module (868 MHz) | Long-range communication | Rs 375 |
| 868 MHz SMA Antenna | LoRa antenna | Rs 120 |
| Capacitive Soil Moisture Sensor v2.0 | Detect dry soil | Rs 90 |
| 5V Single-Channel Relay Module | Switch the water pump | Rs 55 |
| 12V DC Mini Water Pump | Pump water to plants | Rs 250 |
| 12V to 3.3V Buck Converter | Power the ESP32 from 12V | Rs 80 |
| 12V 2A Power Adapter | Main power supply | Rs 250 |
Node 2 -- Gate Monitor
| Component | Purpose | Approx. Price |
|---|---|---|
| ESP32-C3-DEVKITM-1-N4X | Node controller | Rs 1,127 |
| Ra-01H LoRa Module (868 MHz) | Long-range communication | Rs 375 |
| 868 MHz SMA Antenna | LoRa antenna | Rs 120 |
| Magnetic Reed Switch | Detect gate open/close | Rs 40 |
| MG90S Micro Servo | Actuate gate lock | Rs 160 |
| 18650 Li-ion Battery + Holder | Battery power | Rs 180 |
| TP4056 Charging Module | Solar charging circuit | Rs 35 |
| 6V 1W Mini Solar Panel | Solar power | Rs 180 |
Node 3 -- Terrace Weather and Lights
| Component | Purpose | Approx. Price |
|---|---|---|
| ESP32-C3-DEVKITM-1-N4X | Node controller | Rs 1,127 |
| Ra-01H LoRa Module (868 MHz) | Long-range communication | Rs 375 |
| 868 MHz SMA Antenna | LoRa antenna | Rs 120 |
| DHT22 Temperature and Humidity Sensor | Weather monitoring | Rs 250 |
| 5V Single-Channel Relay Module | Switch terrace lights | Rs 55 |
| 5V 1A USB Power Adapter | Power supply (near mains) | Rs 150 |
Miscellaneous
| Component | Purpose | Approx. Price |
|---|---|---|
| Hookup wire (5m) | Wiring connections | Rs 60 |
| 10K Ohm Resistors (pack of 10) | Pull-ups/pull-downs | Rs 15 |
| Weatherproof enclosures (3x) | Protect outdoor nodes | Rs 450 |
| PCB prototype boards (5x) | Solder final circuits | Rs 100 |
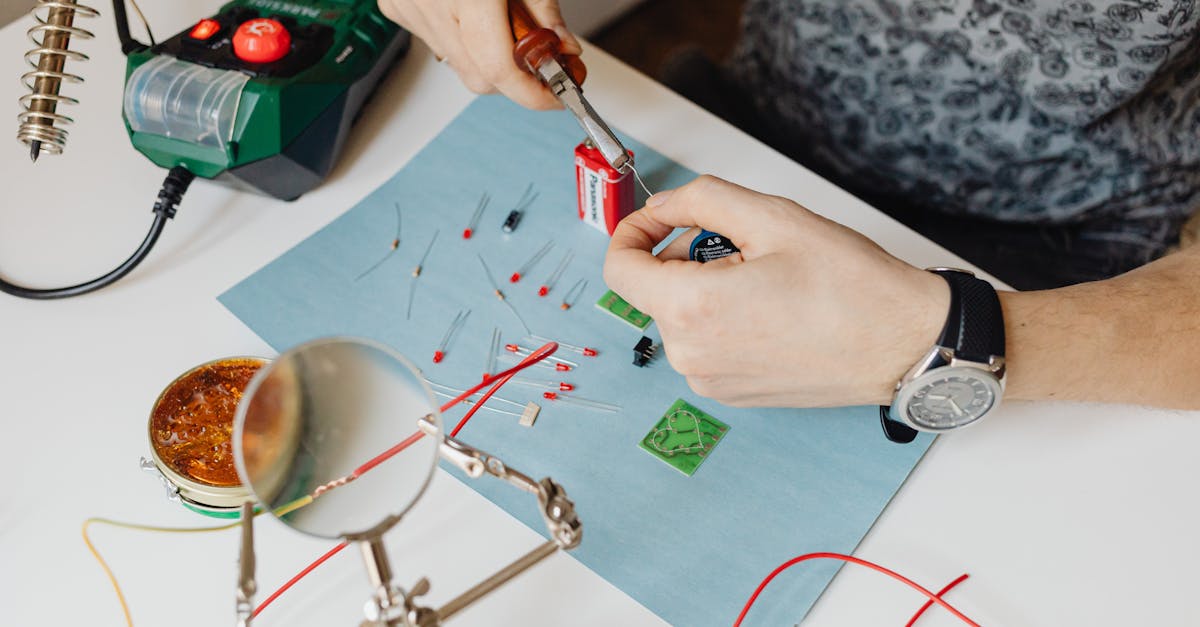
Step 1: Setting Up the LoRa Communication Layer
Before building individual nodes, we need reliable LoRa communication between the hub and nodes. This is the foundation everything else depends on.
Wiring the Ra-01H to ESP32
The Ra-01H uses SPI communication. Connect it to your ESP32 as follows (same wiring for hub and all nodes):
| Ra-01H Pin | ESP32 Pin | Function |
|---|---|---|
| VCC | 3.3V | Power (NEVER use 5V) |
| GND | GND | Ground |
| SCK | GPIO 18 | SPI Clock |
| MISO | GPIO 19 | SPI Data Out |
| MOSI | GPIO 23 | SPI Data In |
| NSS | GPIO 5 | SPI Chip Select |
| RST | GPIO 14 | Reset |
| DIO0 | GPIO 26 | Interrupt |
Important: The Ra-01H operates at 3.3V only. Connecting it to 5V will permanently damage the module. Double-check before powering on.
Installing the LoRa Library
In the Arduino IDE, install the LoRa library by Sandeep Mistry (version 0.8.0 or later) via the Library Manager. Also ensure you have the ESP32 board package installed (by Espressif Systems, version 3.x).
Hub Code -- LoRa Receiver and Command Sender
#include <SPI.h>
#include <LoRa.h>

// LoRa pin definitions
#define LORA_SS    5
#define LORA_RST   14
#define LORA_DIO0  26
#define LORA_FREQ  868E6

// Node addresses
#define HUB_ADDR     0x00
#define GARDEN_ADDR  0x01
#define GATE_ADDR    0x02
#define TERRACE_ADDR 0x03

void setupLoRa() {
  LoRa.setPins(LORA_SS, LORA_RST, LORA_DIO0);

  if (!LoRa.begin(LORA_FREQ)) {
    Serial.println("LoRa init failed!");
    while (1);
  }

  LoRa.setSpreadingFactor(7);
  LoRa.setSignalBandwidth(125E3);
  LoRa.setCodingRate4(5);
  LoRa.setSyncWord(0xAB);  // Private network sync word

  Serial.println("LoRa hub initialized");
}

// Send a command to a specific node
void sendCommand(uint8_t nodeAddr, const String &cmd) {
  LoRa.beginPacket();
  LoRa.write(HUB_ADDR);      // From
  LoRa.write(nodeAddr);       // To
  LoRa.print(cmd);
  LoRa.endPacket();
  Serial.printf("Sent to 0x%02X: %s\n", nodeAddr, cmd.c_str());
}

// Parse incoming packet, return true if addressed to hub
bool receivePacket(uint8_t &fromAddr, String &payload) {
  int packetSize = LoRa.parsePacket();
  if (packetSize == 0) return false;

  uint8_t from = LoRa.read();
  uint8_t to = LoRa.read();

  if (to != HUB_ADDR) return false;  // Not for us

  payload = "";
  while (LoRa.available()) {
    payload += (char)LoRa.read();
  }

  fromAddr = from;
  Serial.printf("Received from 0x%02X (RSSI %d): %s\n",
                from, LoRa.packetRssi(), payload.c_str());
  return true;
}
Node Code -- LoRa Sender and Command Listener
#include <SPI.h>
#include <LoRa.h>

#define LORA_SS    5
#define LORA_RST   14
#define LORA_DIO0  26
#define LORA_FREQ  868E6

#define HUB_ADDR   0x00
#define MY_ADDR    0x01  // Change per node: 0x01, 0x02, 0x03

void setupLoRa() {
  LoRa.setPins(LORA_SS, LORA_RST, LORA_DIO0);

  if (!LoRa.begin(LORA_FREQ)) {
    Serial.println("LoRa init failed!");
    while (1);
  }

  LoRa.setSpreadingFactor(7);
  LoRa.setSignalBandwidth(125E3);
  LoRa.setCodingRate4(5);
  LoRa.setSyncWord(0xAB);  // Must match hub

  Serial.println("LoRa node initialized");
}

// Send sensor data to hub
void sendToHub(const String &data) {
  LoRa.beginPacket();
  LoRa.write(MY_ADDR);    // From
  LoRa.write(HUB_ADDR);   // To
  LoRa.print(data);
  LoRa.endPacket();
}

// Check for commands from hub
bool checkForCommand(String &cmd) {
  int packetSize = LoRa.parsePacket();
  if (packetSize == 0) return false;

  uint8_t from = LoRa.read();
  uint8_t to = LoRa.read();

  if (to != MY_ADDR) return false;

  cmd = "";
  while (LoRa.available()) {
    cmd += (char)LoRa.read();
  }
  return true;
}
Test this first. Upload the hub code to your hub ESP32 and the node code to any node ESP32. Open both serial monitors. The node should be able to send a test message and the hub should receive it. Verify this works before proceeding.
Step 2: Building the Garden Watering Node
This node reads soil moisture and controls a water pump. It reports moisture levels to the hub every 30 seconds, and the hub (or you via the dashboard) can trigger watering.
Wiring
ESP32-C3 Connections:
  GPIO 34 (ADC) -----> Soil Moisture Sensor (Analog Out)
  GPIO 25 -----------> Relay Module (IN)
  GPIO 18,19,23,5,14,26 -> Ra-01H (SPI, as above)

Relay Module:
  COM -------> 12V Power Supply (+)
  NO --------> Water Pump (+)
  Pump (-) --> 12V Power Supply (-)

Power:
  12V Adapter -> Buck Converter -> 3.3V to ESP32 VIN
  12V Adapter -> Relay COM (for pump)
Note on soil moisture sensors: Use the capacitive type (v2.0), not the resistive type. Resistive sensors corrode within weeks in wet soil. The capacitive version lasts much longer.
Node 1 Code -- Garden
#include <SPI.h>
#include <LoRa.h>

#define LORA_SS    5
#define LORA_RST   14
#define LORA_DIO0  26
#define LORA_FREQ  868E6

#define HUB_ADDR   0x00
#define MY_ADDR    0x01

#define SOIL_PIN   34
#define RELAY_PIN  25

// Calibration values -- adjust after testing with your sensor
#define SOIL_DRY   3200   // ADC reading in dry air
#define SOIL_WET   1400   // ADC reading submerged in water

bool pumpRunning = false;
unsigned long lastReport = 0;
const unsigned long REPORT_INTERVAL = 30000;  // 30 seconds

void setup() {
  Serial.begin(115200);
  pinMode(RELAY_PIN, OUTPUT);
  digitalWrite(RELAY_PIN, LOW);  // Pump off initially

  setupLoRa();  // From Step 1
}

void loop() {
  // Read soil moisture
  int rawValue = analogRead(SOIL_PIN);
  int moisturePercent = map(rawValue, SOIL_DRY, SOIL_WET, 0, 100);
  moisturePercent = constrain(moisturePercent, 0, 100);

  // Report to hub periodically
  if (millis() - lastReport > REPORT_INTERVAL) {
    String data = "GARDEN|moisture=" + String(moisturePercent) +
                  "|pump=" + String(pumpRunning ? "ON" : "OFF");
    sendToHub(data);
    lastReport = millis();
  }

  // Auto-water if soil is very dry (below 20%)
  if (moisturePercent < 20 && !pumpRunning) {
    startPump();
    sendToHub("GARDEN|event=auto_water_start");
  }

  // Stop auto-water when soil is moist enough (above 60%)
  if (moisturePercent > 60 && pumpRunning) {
    stopPump();
    sendToHub("GARDEN|event=auto_water_stop");
  }

  // Check for manual commands from hub
  String cmd;
  if (checkForCommand(cmd)) {
    if (cmd == "PUMP_ON")  startPump();
    if (cmd == "PUMP_OFF") stopPump();
  }

  delay(100);
}

void startPump() {
  digitalWrite(RELAY_PIN, HIGH);
  pumpRunning = true;
  Serial.println("Pump ON");
}

void stopPump() {
  digitalWrite(RELAY_PIN, LOW);
  pumpRunning = false;
  Serial.println("Pump OFF");
}
Calibration tip: Before installing in the garden, note the ADC reading with the sensor in dry air (SOIL_DRY) and in a glass of water (SOIL_WET). Update the #define values accordingly. Every sensor varies slightly.
Step 3: Building the Gate Monitor Node
This node detects whether your gate is open or closed using a magnetic reed switch, and can lock/unlock a gate latch using a servo motor.
Wiring
ESP32-C3 Connections:
  GPIO 32 -----------> Reed Switch (one terminal)
  Reed Switch (other) -> GND
  GPIO 27 -----------> Servo Signal (orange wire)
  GPIO 18,19,23,5,14,26 -> Ra-01H (SPI)

Servo:
  Red wire -----> 5V (from TP4056 output via boost converter)
  Brown wire ---> GND
  Orange wire --> GPIO 27

Reed Switch:
  Uses internal pull-up on GPIO 32.
  Switch closes (LOW) when magnet is near = gate closed.
  Switch opens (HIGH) when magnet is far = gate open.

Power:
  Solar Panel -> TP4056 -> 18650 Battery -> Buck/Boost -> ESP32
Node 2 Code -- Gate
#include <SPI.h>
#include <LoRa.h>
#include <ESP32Servo.h>

#define LORA_SS    5
#define LORA_RST   14
#define LORA_DIO0  26
#define LORA_FREQ  868E6

#define HUB_ADDR   0x00
#define MY_ADDR    0x02

#define REED_PIN   32
#define SERVO_PIN  27

Servo lockServo;
bool gateClosed = true;
bool lockEngaged = true;
bool lastGateState = true;
unsigned long lastReport = 0;
const unsigned long REPORT_INTERVAL = 15000;  // 15 seconds

void setup() {
  Serial.begin(115200);
  pinMode(REED_PIN, INPUT_PULLUP);
  lockServo.attach(SERVO_PIN);
  lockServo.write(0);  // Lock position

  setupLoRa();  // From Step 1
}

void loop() {
  // Read gate state
  gateClosed = (digitalRead(REED_PIN) == LOW);

  // Detect state change -- send immediately
  if (gateClosed != lastGateState) {
    String event = gateClosed ? "gate_closed" : "gate_opened";
    String data = "GATE|event=" + event;
    sendToHub(data);
    lastGateState = gateClosed;

    // Safety: disengage lock if gate is opened physically
    if (!gateClosed && lockEngaged) {
      unlockGate();
    }
  }

  // Periodic status report
  if (millis() - lastReport > REPORT_INTERVAL) {
    String data = "GATE|closed=" + String(gateClosed ? "YES" : "NO") +
                  "|locked=" + String(lockEngaged ? "YES" : "NO");
    sendToHub(data);
    lastReport = millis();
  }

  // Check for commands
  String cmd;
  if (checkForCommand(cmd)) {
    if (cmd == "LOCK")   lockGate();
    if (cmd == "UNLOCK") unlockGate();
  }

  delay(100);
}

void lockGate() {
  if (!gateClosed) {
    sendToHub("GATE|error=cannot_lock_gate_open");
    return;
  }
  lockServo.write(0);    // Locked position
  lockEngaged = true;
  sendToHub("GATE|event=locked");
  Serial.println("Gate locked");
}

void unlockGate() {
  lockServo.write(90);   // Unlocked position
  lockEngaged = false;
  sendToHub("GATE|event=unlocked");
  Serial.println("Gate unlocked");
}
Mounting the reed switch: Attach one part (the switch) to the gate frame and the other part (the magnet) to the gate itself. When the gate closes, the magnet aligns with the switch, pulling the GPIO LOW. Test the gap distance -- most reed switches work within 15-20 mm.
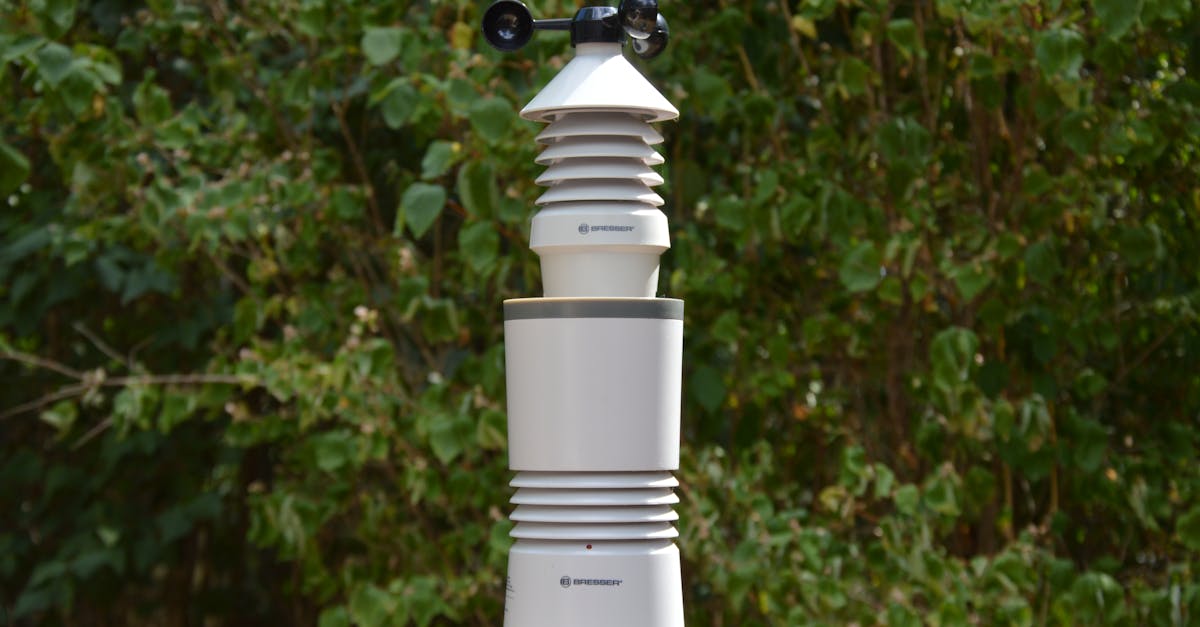
Step 4: Building the Terrace Weather and Light Node
This node monitors temperature and humidity on the terrace and controls the terrace lights via a relay.
Wiring
ESP32-C3 Connections:
  GPIO 4  -----------> DHT22 Data Pin
  GPIO 25 -----------> Relay Module (IN)
  GPIO 18,19,23,5,14,26 -> Ra-01H (SPI)

DHT22:
  Pin 1 (VCC) ------> 3.3V
  Pin 2 (Data) ------> GPIO 4 (with 10K pull-up to 3.3V)
  Pin 3 (NC) --------> Not connected
  Pin 4 (GND) -------> GND

Relay Module:
  COM -------> Mains Live (from existing terrace light switch)
  NO --------> Terrace Light Fixture Live
  (Neutral goes directly to light fixture)

Power:
  5V USB adapter near terrace mains outlet -> ESP32 USB
Safety warning: This node switches mains voltage (230V AC) through the relay. If you are not comfortable working with mains wiring, get an electrician to wire the relay into your terrace light circuit. Use a relay module rated for 230V/10A minimum.
Node 3 Code -- Terrace
#include <SPI.h>
#include <LoRa.h>
#include <DHT.h>

#define LORA_SS    5
#define LORA_RST   14
#define LORA_DIO0  26
#define LORA_FREQ  868E6

#define HUB_ADDR   0x00
#define MY_ADDR    0x03

#define DHT_PIN    4
#define DHT_TYPE   DHT22
#define RELAY_PIN  25

DHT dht(DHT_PIN, DHT_TYPE);

bool lightsOn = false;
unsigned long lastReport = 0;
const unsigned long REPORT_INTERVAL = 30000;  // 30 seconds

// Auto-light settings
bool autoMode = true;
int lightsOnHour = 18;   // 6 PM
int lightsOffHour = 6;   // 6 AM

void setup() {
  Serial.begin(115200);
  pinMode(RELAY_PIN, OUTPUT);
  digitalWrite(RELAY_PIN, LOW);
  dht.begin();

  setupLoRa();  // From Step 1
}

void loop() {
  float temperature = dht.readTemperature();
  float humidity = dht.readHumidity();

  // Validate readings
  if (isnan(temperature) || isnan(humidity)) {
    Serial.println("DHT read failed, retrying...");
    delay(2000);
    return;
  }

  // Periodic report
  if (millis() - lastReport > REPORT_INTERVAL) {
    String data = "TERRACE|temp=" + String(temperature, 1) +
                  "|humidity=" + String(humidity, 1) +
                  "|lights=" + String(lightsOn ? "ON" : "OFF");
    sendToHub(data);
    lastReport = millis();
  }

  // Check for commands
  String cmd;
  if (checkForCommand(cmd)) {
    if (cmd == "LIGHTS_ON")   { setLights(true);  }
    if (cmd == "LIGHTS_OFF")  { setLights(false); }
    if (cmd == "AUTO_ON")     { autoMode = true;   }
    if (cmd == "AUTO_OFF")    { autoMode = false;  }
  }

  delay(100);
}

void setLights(bool on) {
  lightsOn = on;
  digitalWrite(RELAY_PIN, on ? HIGH : LOW);
  Serial.printf("Terrace lights %s\n", on ? "ON" : "OFF");
}
Note about time-based automation: The ESP32 does not have a real-time clock. For the auto-light feature based on time of day, the hub should send time information to the terrace node, or you can add a DS3231 RTC module (around Rs 120) to the terrace node. For simplicity, you can control lights manually from the dashboard initially.
Step 5: Creating the Web Dashboard on the Hub
The hub ESP32 runs a web server that displays data from all three nodes and lets you send commands. This is where the ESP32's WiFi capability shines.
Hub Complete Code
#include <WiFi.h>
#include <WebServer.h>
#include <SPI.h>
#include <LoRa.h>
// WiFi credentials
const char* ssid = "YOUR_WIFI_SSID";
const char* password = "YOUR_WIFI_PASSWORD";
// LoRa pins
#define LORA_SS 5
#define LORA_RST 14
#define LORA_DIO0 26
#define LORA_FREQ 868E6
#define HUB_ADDR 0x00
WebServer server(80);
// Node data storage
struct GardenData {
int moisture = 0;
String pumpState = "OFF";
long lastSeen = 0;
};
struct GateData {
bool closed = true;
bool locked = true;
long lastSeen = 0;
};
struct TerraceData {
float temperature = 0;
float humidity = 0;
String lightsState = "OFF";
long lastSeen = 0;
};
GardenData garden;
GateData gate;
TerraceData terrace;
void setup() {
Serial.begin(115200);
// Connect to WiFi
WiFi.begin(ssid, password);
Serial.print("Connecting to WiFi");
while (WiFi.status() != WL_CONNECTED) {
delay(500);
Serial.print(".");
}
Serial.printf("\nConnected! IP: %s\n", WiFi.localIP().toString().c_str());
// Initialize LoRa
setupLoRa();
// Web server routes
server.on("/", handleRoot);
server.on("/api/status", handleStatus);
server.on("/api/command", handleCommand);
server.begin();
Serial.println("Web server started");
}
void loop() {
server.handleClient();
// Check for incoming LoRa packets
uint8_t fromAddr;
String payload;
if (receivePacket(fromAddr, payload)) {
parseNodeData(fromAddr, payload);
}
}
void parseNodeData(uint8_t from, const String &data) {
if (data.startsWith("GARDEN|")) {
// Parse garden data
int moistIdx = data.indexOf("moisture=");
int pumpIdx = data.indexOf("pump=");
if (moistIdx >= 0) {
garden.moisture = data.substring(moistIdx + 9,
data.indexOf("|", moistIdx + 9)).toInt();
}
if (pumpIdx >= 0) {
garden.pumpState = data.substring(pumpIdx + 5);
}
garden.lastSeen = millis();
}
else if (data.startsWith("GATE|")) {
int closedIdx = data.indexOf("closed=");
int lockedIdx = data.indexOf("locked=");
if (closedIdx >= 0) {
gate.closed = data.substring(closedIdx + 7, closedIdx + 10) == "YES";
}
if (lockedIdx >= 0) {
gate.locked = data.substring(lockedIdx + 7, lockedIdx + 10) == "YES";
}
gate.lastSeen = millis();
}
else if (data.startsWith("TERRACE|")) {
int tempIdx = data.indexOf("temp=");
int humIdx = data.indexOf("humidity=");
int lightIdx = data.indexOf("lights=");
if (tempIdx >= 0) {
terrace.temperature = data.substring(tempIdx + 5,
data.indexOf("|", tempIdx + 5)).toFloat();
}
if (humIdx >= 0) {
terrace.humidity = data.substring(humIdx + 9,
data.indexOf("|", humIdx + 9)).toFloat();
}
if (lightIdx >= 0) {
terrace.lightsState = data.substring(lightIdx + 7);
}
terrace.lastSeen = millis();
}
}
void handleStatus() {
String json = "{";
json += "\"garden\":{\"moisture\":" + String(garden.moisture);
json += ",\"pump\":\"" + garden.pumpState + "\"";
json += ",\"online\":" + String((millis() - garden.lastSeen) < 60000
? "true" : "false") + "},";
json += "\"gate\":{\"closed\":" + String(gate.closed ? "true" : "false");
json += ",\"locked\":" + String(gate.locked ? "true" : "false");
json += ",\"online\":" + String((millis() - gate.lastSeen) < 60000
? "true" : "false") + "},";
json += "\"terrace\":{\"temp\":" + String(terrace.temperature, 1);
json += ",\"humidity\":" + String(terrace.humidity, 1);
json += ",\"lights\":\"" + terrace.lightsState + "\"";
json += ",\"online\":" + String((millis() - terrace.lastSeen) < 60000
? "true" : "false") + "}}";
server.send(200, "application/json", json);
}
void handleCommand() {
String node = server.arg("node");
String cmd = server.arg("cmd");
if (node == "garden") {
sendCommand(0x01, cmd);
} else if (node == "gate") {
sendCommand(0x02, cmd);
} else if (node == "terrace") {
sendCommand(0x03, cmd);
}
server.send(200, "text/plain", "OK");
}
void handleRoot() {
String html = R"rawliteral(
<!DOCTYPE html>
<html>
<head>
<meta name="viewport" content="width=device-width, initial-scale=1">
<title>Home Automation Hub</title>
<style>
* { box-sizing: border-box; margin: 0; padding: 0; }
body { font-family: -apple-system, sans-serif; background: #0F1A2E;
color: #f1f5f9; padding: 16px; }
h1 { font-size: 1.5rem; margin-bottom: 16px; color: #FF6B35; }
.card { background: #1a2744; border-radius: 12px; padding: 16px;
margin-bottom: 12px; border: 1px solid rgba(255,255,255,0.08); }
.card h2 { font-size: 1.1rem; margin-bottom: 8px; }
.status { font-size: 0.85rem; color: rgba(255,255,255,0.6);
margin-bottom: 12px; }
.value { font-size: 1.8rem; font-weight: 700; color: #FF6B35; }
.label { font-size: 0.75rem; color: rgba(255,255,255,0.48); }
.online { color: #10B981; }
.offline { color: #dc3545; }
.btn { background: #FF6B35; color: #fff; border: none;
padding: 8px 16px; border-radius: 8px; font-size: 0.85rem;
cursor: pointer; margin-right: 8px; margin-top: 8px; }
.btn:hover { opacity: 0.9; }
.btn-off { background: #64748B; }
.grid { display: grid; grid-template-columns: 1fr 1fr; gap: 8px; }
</style>
</head>
<body>
<h1>Home Automation</h1>
<div id="dashboard"></div>
<script>
async function refresh() {
const r = await fetch('/api/status');
const d = await r.json();
document.getElementById('dashboard').innerHTML = `
<div class="card">
<h2>Garden</h2>
<span class="${d.garden.online?'online':'offline'}">
${d.garden.online?'Online':'Offline'}</span>
<div class="grid" style="margin-top:8px">
<div><span class="value">${d.garden.moisture}%</span>
<br><span class="label">Soil Moisture</span></div>
<div><span class="value">${d.garden.pump}</span>
<br><span class="label">Pump</span></div>
</div>
<button class="btn" onclick="cmd('garden','PUMP_ON')">
Pump On</button>
<button class="btn btn-off" onclick="cmd('garden','PUMP_OFF')">
Pump Off</button>
</div>
<div class="card">
<h2>Gate</h2>
<span class="${d.gate.online?'online':'offline'}">
${d.gate.online?'Online':'Offline'}</span>
<div class="grid" style="margin-top:8px">
<div><span class="value">${d.gate.closed?'Closed':'Open'}
</span><br><span class="label">Gate</span></div>
<div><span class="value">${d.gate.locked?'Locked':'Unlocked'}
</span><br><span class="label">Lock</span></div>
</div>
<button class="btn" onclick="cmd('gate','LOCK')">
Lock</button>
<button class="btn btn-off" onclick="cmd('gate','UNLOCK')">
Unlock</button>
</div>
<div class="card">
<h2>Terrace</h2>
<span class="${d.terrace.online?'online':'offline'}">
${d.terrace.online?'Online':'Offline'}</span>
<div class="grid" style="margin-top:8px">
<div><span class="value">${d.terrace.temp}°C</span>
<br><span class="label">Temperature</span></div>
<div><span class="value">${d.terrace.humidity}%</span>
<br><span class="label">Humidity</span></div>
</div>
<button class="btn" onclick="cmd('terrace','LIGHTS_ON')">
Lights On</button>
<button class="btn btn-off" onclick="cmd('terrace','LIGHTS_OFF')">
Lights Off</button>
</div>`;
}
function cmd(node, c) {
fetch('/api/command?node='+node+'&cmd='+c).then(()=>refresh());
}
refresh();
setInterval(refresh, 5000);
</script>
</body>
</html>
)rawliteral";
server.send(200, "text/html", html);
}
After uploading, open the Serial Monitor to see the hub's IP address (something like 192.168.1.105). Type that IP into any browser on the same WiFi network. You will see a dashboard showing all three nodes with their current data and control buttons.
Tip: Bookmark the IP address on your phone's home screen for quick access. You can also set a static IP in your router's DHCP settings so the address never changes.
Power Considerations
Getting power right is critical, especially for outdoor nodes.
Central Hub (indoors): Simply use a USB power supply. The hub needs to be always on, so connect it to a reliable indoor outlet. Power consumption is around 150-200 mA continuously.
Garden Node (outdoors, near mains): Since the water pump needs 12V mains-powered adapter anyway, power the ESP32 from the same supply through a buck converter. No battery needed.
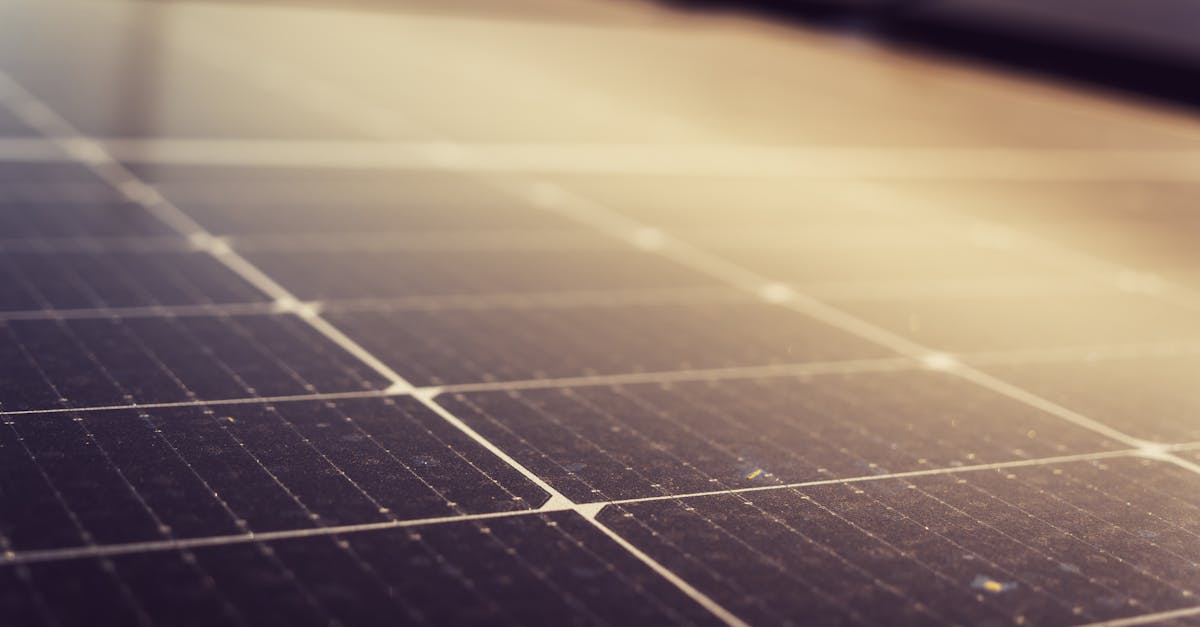
Gate Node (outdoors, no mains): This is the ideal candidate for solar power.
- 6V 1W solar panel charges an 18650 battery through a TP4056 module
- Use ESP32 deep sleep between readings to extend battery life dramatically
- Wake up every 15 seconds, read sensors, send data, go back to sleep
- In deep sleep, the ESP32 draws only ~10 uA
- A 2600 mAh 18650 can last 2-3 weeks even in cloudy weather with the solar panel topping up
Add this to the gate node for deep sleep:
// Replace the delay(100) in the main loop with deep sleep
#define SLEEP_SECONDS 15

// At the end of loop(), instead of delay:
esp_sleep_enable_timer_wakeup(SLEEP_SECONDS * 1000000ULL);
esp_deep_sleep_start();
Terrace Node (outdoors, near mains): Your terrace likely has a power outlet for the lights. Use a 5V USB adapter plugged into that outlet.
General tips:
- Use weatherproof enclosures (IP65 rated) for all outdoor nodes
- Apply silicone sealant around cable entry points
- Mount solar panels at a 15-degree angle facing south (for Indian latitudes) for optimal charging
- Keep LoRa antennas outside the enclosure or use an enclosure with an external antenna mount
Security Considerations
LoRa packets are transmitted in plain text by default. Anyone with a LoRa receiver on the same frequency can read your data or, worse, send fake commands to your nodes. For a home system, here is a practical approach.
Simple XOR Encryption
Add a shared secret key and XOR-encrypt the payload before sending:
const char ENCRYPTION_KEY[] = "Wavtr0n2026!Secret";

String encrypt(const String &plaintext) {
  String encrypted = "";
  for (int i = 0; i < plaintext.length(); i++) {
    encrypted += (char)(plaintext[i] ^
                  ENCRYPTION_KEY[i % strlen(ENCRYPTION_KEY)]);
  }
  return encrypted;
}

String decrypt(const String &ciphertext) {
  // XOR is symmetric -- same function works for decryption
  return encrypt(ciphertext);
}

// Modified send function
void sendToHub(const String &data) {
  String encrypted = encrypt(data);
  LoRa.beginPacket();
  LoRa.write(MY_ADDR);
  LoRa.write(HUB_ADDR);
  LoRa.print(encrypted);
  LoRa.endPacket();
}
Important caveats:
- XOR encryption is not cryptographically secure. It stops casual snoopers but will not withstand a determined attacker.
- For serious security, implement AES-128 encryption using the ESP32's hardware AES accelerator (the
mbedtlslibrary is available in the ESP32 Arduino core). - Add a rolling counter or timestamp to each packet to prevent replay attacks.
- For a home automation system in a residential area, XOR encryption is a reasonable starting point.
Expanding the System
Once the three-node system is running, you will likely want to add more nodes. The architecture supports this easily.
Adding More Nodes
- Assign a new address (0x04, 0x05, etc.)
- Wire up the ESP32 + Ra-01H + your sensors/actuators
- Use the same LoRa communication layer from Step 1
- Add parsing logic in the hub's
parseNodeData()function - Add a card to the dashboard HTML
Ideas for additional nodes:
- Parking area: Ultrasonic sensor to detect if the car is parked, LED indicator for guests
- Water tank: Ultrasonic level sensor to monitor tank level, alert when low
- Main door: PIR motion sensor + buzzer for a simple security alert
- Balcony: Light-dependent resistor (LDR) + relay for automatic balcony lights
Integrating with MQTT and Home Assistant
For a more polished setup, you can bridge LoRa data into your home network using MQTT:
#include <PubSubClient.h>

WiFiClient espClient;
PubSubClient mqtt(espClient);

void setupMQTT() {
  mqtt.setServer("192.168.1.100", 1883);  // Your MQTT broker
  mqtt.setCallback(mqttCallback);
}

// In parseNodeData(), after parsing, publish to MQTT:
void publishToMQTT(const String &topic, const String &value) {
  mqtt.publish(topic.c_str(), value.c_str());
}

// Example: after parsing garden moisture
publishToMQTT("home/garden/moisture", String(garden.moisture));
publishToMQTT("home/garden/pump", garden.pumpState);
With MQTT, you can connect to Home Assistant, Node-RED, or any smart home platform. This gives you proper historical data logging, complex automations (e.g., "if temperature is above 35C AND humidity below 30%, water the garden"), and voice control through Google Home or Alexa.
Total Cost Breakdown
Here is the complete bill of materials for the three-node system:
| Category | Items | Cost |
|---|---|---|
| Central Hub | ESP32 + Ra-01H + antenna + breadboard + PSU | Rs 2,063 |
| Garden Node | ESP32 + Ra-01H + antenna + soil sensor + relay + pump + buck converter + 12V adapter | Rs 2,347 |
| Gate Node | ESP32 + Ra-01H + antenna + reed switch + servo + battery + TP4056 + solar panel | Rs 2,217 |
| Terrace Node | ESP32 + Ra-01H + antenna + DHT22 + relay + USB adapter | Rs 2,077 |
| Miscellaneous | Wire + resistors + enclosures + PCBs | Rs 625 |
| Total | Rs 9,329 |
Under Rs 10,000 for a complete three-node home automation system with long-range wireless connectivity. Compare this to commercial smart home systems that cost Rs 30,000-50,000 and still cannot reach your garden gate.
Where to save further:
- Use ESP32-C3-MINI-1 modules (Rs 285 each) instead of full DevKits for permanent installations -- they are smaller and cheaper, though you will need to solder pin headers and add a USB-UART converter for programming
- Buy components in bulk -- LoRa modules and ESP32s are cheaper in packs of 5
- Reuse old phone chargers as 5V power supplies
Troubleshooting Common Issues
LoRa communication not working:
- Verify both modules use the exact same frequency, spreading factor, bandwidth, and sync word
- Check SPI wiring -- a single loose jumper wire will cause complete failure
- Ensure the Ra-01H is powered at 3.3V, not 5V
- Attach the antenna before powering on -- transmitting without an antenna can damage the module
Soil moisture readings erratic:
- Add a 100nF capacitor between VCC and GND of the sensor
- Use analogReadMilliVolts() instead of analogRead() for more stable readings on ESP32
- Take an average of 10 readings instead of a single reading
WiFi disconnects on the hub:
- Add a WiFi reconnect check in the main loop
- Use WiFi.setAutoReconnect(true) after WiFi.begin()
- Consider using WiFi.mode(WIFI_STA) to disable the default AP mode
Servo jittering:
- Use a separate power supply for the servo, not the ESP32's 3.3V pin
- Add a 470uF capacitor across the servo's power pins
- Detach the servo after reaching position:
lockServo.detach()saves power and stops jitter
Wrapping Up
You now have a working three-node home automation system that communicates over LoRa, controlled from a web dashboard on your phone. The total cost is under Rs 10,000, it reaches every corner of your property, and it does not depend on cloud services or monthly subscriptions.
The real power of this setup is its expandability. Every new node is just another ESP32 + Ra-01H with whatever sensor or actuator you need. The garden node took about an hour to build and test. By the third node, you will be doing it in 20 minutes.
Start with one node. Get it working. Then expand. That is the beauty of building your own system -- you control every aspect, and you learn something with every node you add.
All components used in this project -- ESP32 DevKits, Ra-01H LoRa modules, MG90S servos, and more -- are available at wavtron.in with genuine parts from authorized distributors.